Difference between revisions of "Web Application Scheduler Portlet"
(→Scheduler Portlet) |
(→Scheduler Portlet) |
||
| Line 7: | Line 7: | ||
<br> | <br> | ||
On the left side there is the main form where depending on the command the client should also fill the appropriate fields. <br> | On the left side there is the main form where depending on the command the client should also fill the appropriate fields. <br> | ||
| − | [[File:Portlet-main.png|300px|thumb|center| | + | [[File:Portlet-main.png|300px|thumb|center|Main form]]<br> |
<br> | <br> | ||
| − | The commands are: schedule,monitor,cancel,get outcomes and get transfers. When the client submit the command a pop up window shows the result except the schedule command where the submit button leads the user on the right form so as to choose the files/URI's he wants to transfer.<br> | + | The commands are: schedule,monitor,cancel,get outcomes and get transfers. When the client submit the command a pop up window shows the result except the schedule command where the submit button leads the user on the right form so as to choose the files/URI's he wants to transfer and the get transfer command where the results are shown in the bottom form.<br> |
| + | |||
| + | [[File:Portlet-result1.png|400px|thumb|center|Example with a result]]<br> | ||
<br> | <br> | ||
| − | |||
The right side is for the schedule details. <br> | The right side is for the schedule details. <br> | ||
There are three source types: workspace, datasources, URI's. <br> | There are three source types: workspace, datasources, URI's. <br> | ||
The first one is for choosing files from a given folder by the portlet. This folder is relevant to the current user. <br> | The first one is for choosing files from a given folder by the portlet. This folder is relevant to the current user. <br> | ||
| − | [[File:Portlet-schedule_details1.png|400px|thumb|center| | + | [[File:Portlet-schedule_details1.png|400px|thumb|center|Schedule details form (selected workspace)]]<br> |
| − | <br> | + | |
With the second one we choose the datasource and then the files we want to schedule. <br> | With the second one we choose the datasource and then the files we want to schedule. <br> | ||
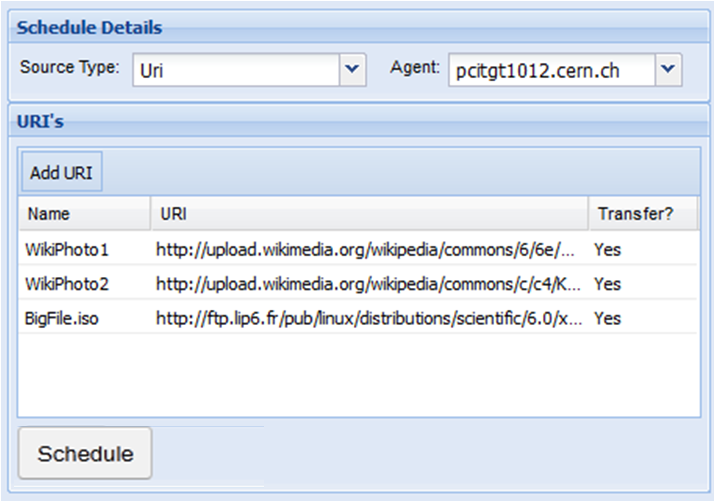
The last one if for scheduling the files represented from URI's. <br> | The last one if for scheduling the files represented from URI's. <br> | ||
| − | [[File:Portlet-schedule_details2.png|400px|thumb|center| | + | [[File:Portlet-schedule_details2.png|400px|thumb|center|Schedule details form (selected URI's)]]<br> |
<br> | <br> | ||
The already submitted scheduled transfers can be seen in the bottom form. <br> | The already submitted scheduled transfers can be seen in the bottom form. <br> | ||
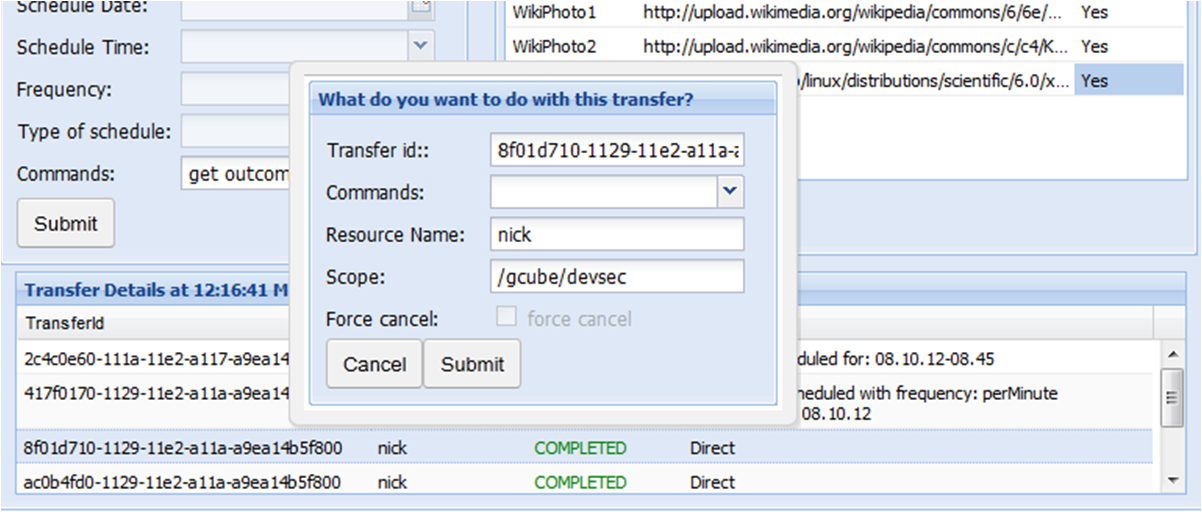
| − | [[File:Portlet- | + | A double click on one of them will give us a pop up window where we can also choose a command for this specific scheduled transfer.<br> |
| + | [[File:Portlet-bottom_popup.png|650px|thumb|center|The bottom form]]<br> | ||
Revision as of 13:02, 8 October 2012
Scheduler Portlet
The scheduler portlet is an interface implemented for the client with the general purpose of scheduling transfers. The client has also the option of monitoring and canceling the transfer. In addition there are two more operations for getting the outcomes of a transfer and getting the transfer from the database.
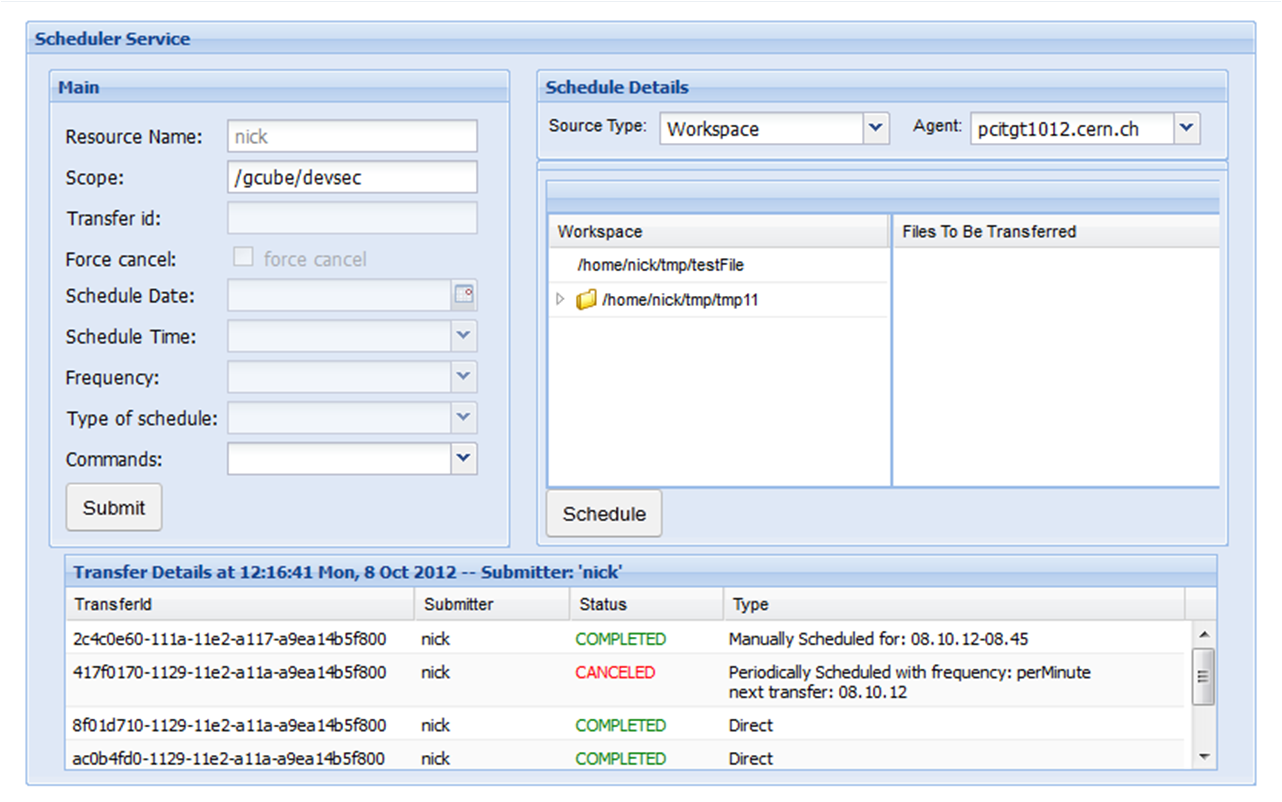
This is how it looks :
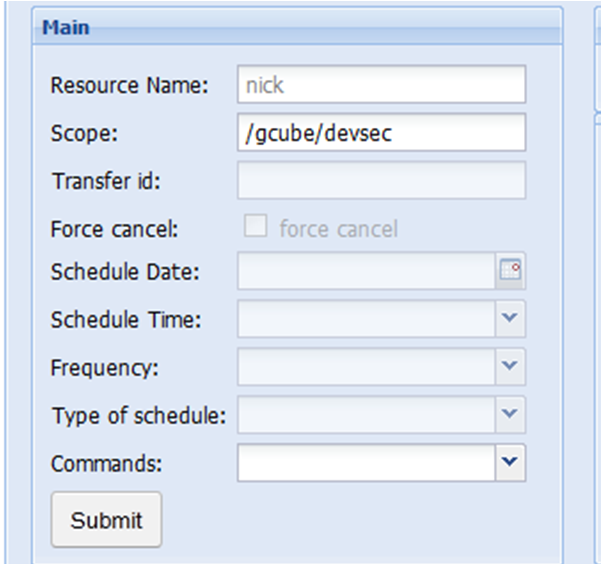
On the left side there is the main form where depending on the command the client should also fill the appropriate fields.
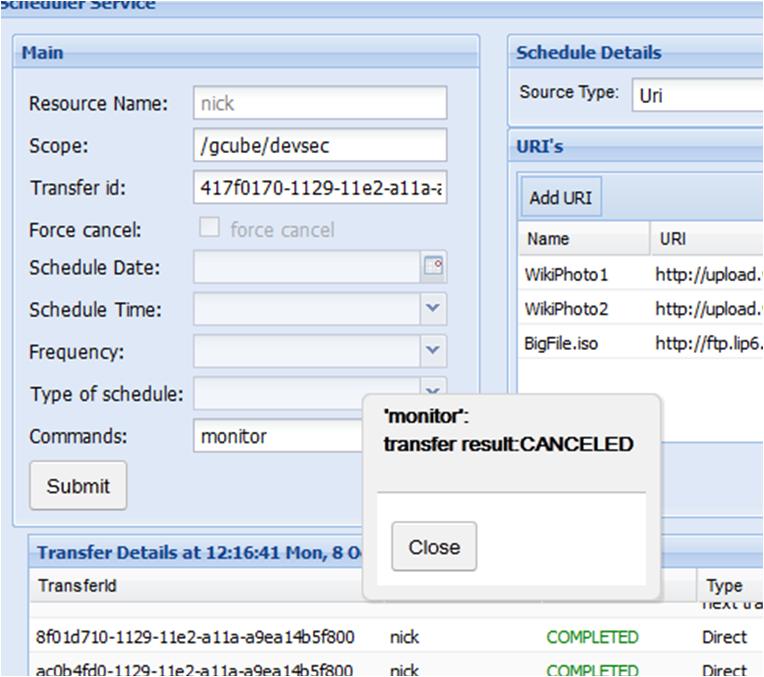
The commands are: schedule,monitor,cancel,get outcomes and get transfers. When the client submit the command a pop up window shows the result except the schedule command where the submit button leads the user on the right form so as to choose the files/URI's he wants to transfer and the get transfer command where the results are shown in the bottom form.
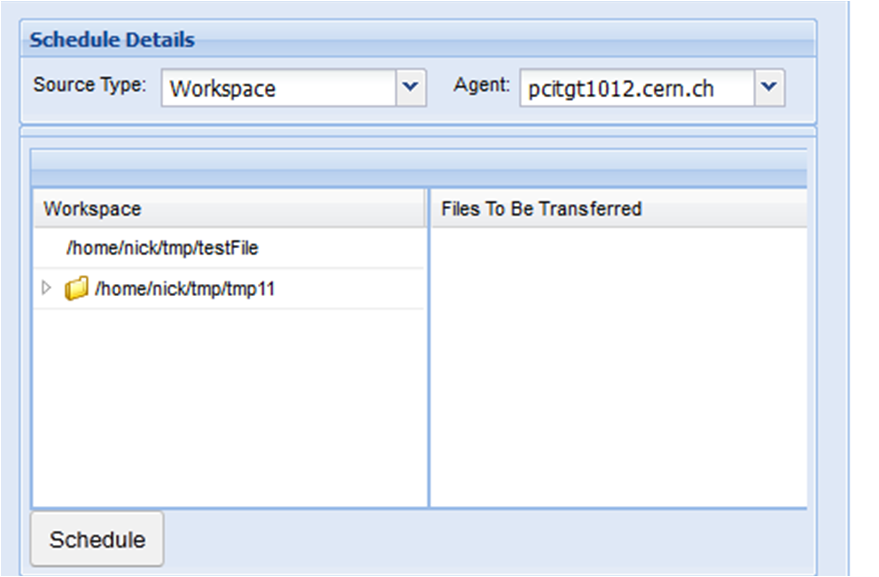
The right side is for the schedule details.
There are three source types: workspace, datasources, URI's.
The first one is for choosing files from a given folder by the portlet. This folder is relevant to the current user.
With the second one we choose the datasource and then the files we want to schedule.
The last one if for scheduling the files represented from URI's.
The already submitted scheduled transfers can be seen in the bottom form.
A double click on one of them will give us a pop up window where we can also choose a command for this specific scheduled transfer.
