Users' Management
DEPRECATED
The Users and Groups Management Portlet provides the functionality for managing the available users and groups for each VO/VRE. This portlet can only by accessed by users with the "VO-Admin" role at VO level and with the "VRE-Manager" role at VRE level
User Guide
The portlet is divided into 2 main tabs offering distinct functionality for the management of users and groups respectively.
Users Management
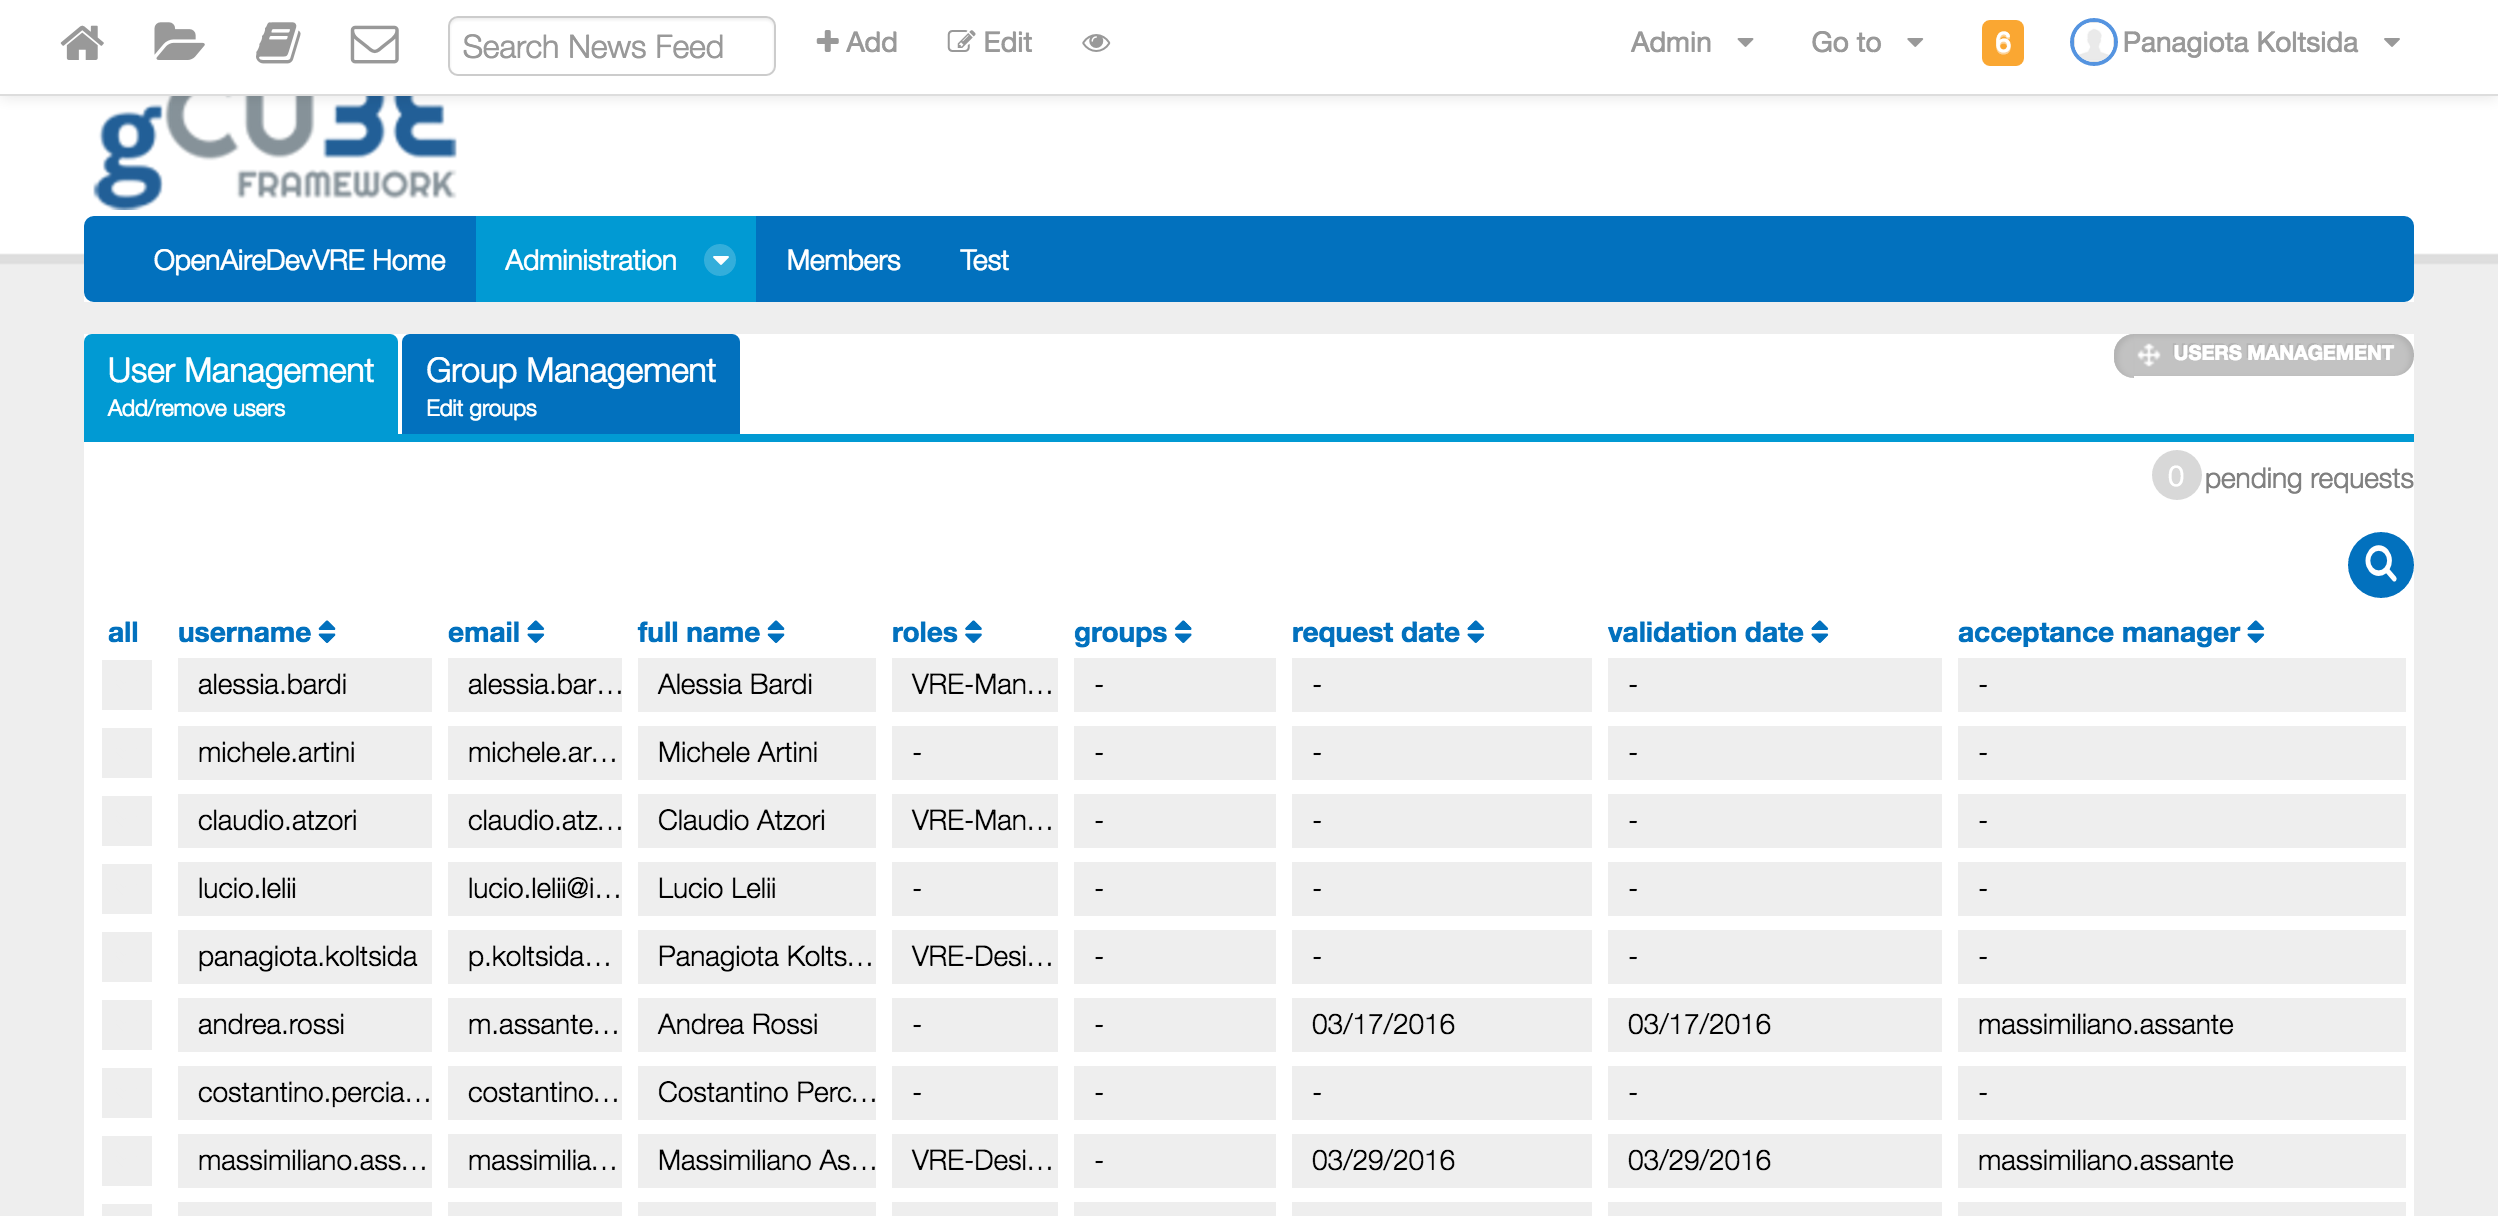
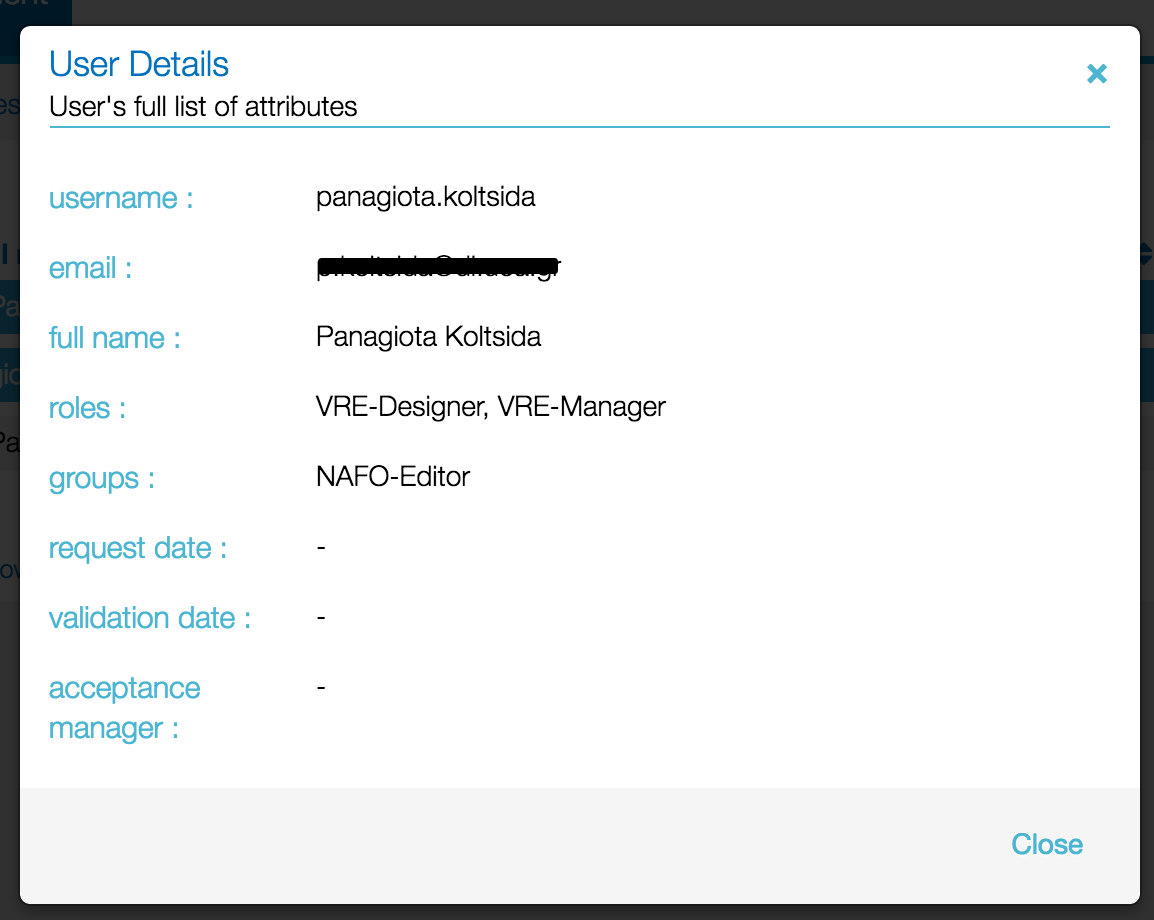
Users belonging to the VO/VRE can be management here. For every user the following information is available in a table view and you can see additional information by simply clicking on the desired row.
- username: user's username
- email: user's email address
- full name: user's full name
- roles: user's assigned roles for the current VO/VRE
- groups: user's belonging groups for the current VO/VRE
- request date: date user requested to join the VO/VRE
- validation date: date user has been added to the VO/VRE
- acceptance manager: who added the user to the VO/VRE
The following image shows how user's details are displayed:
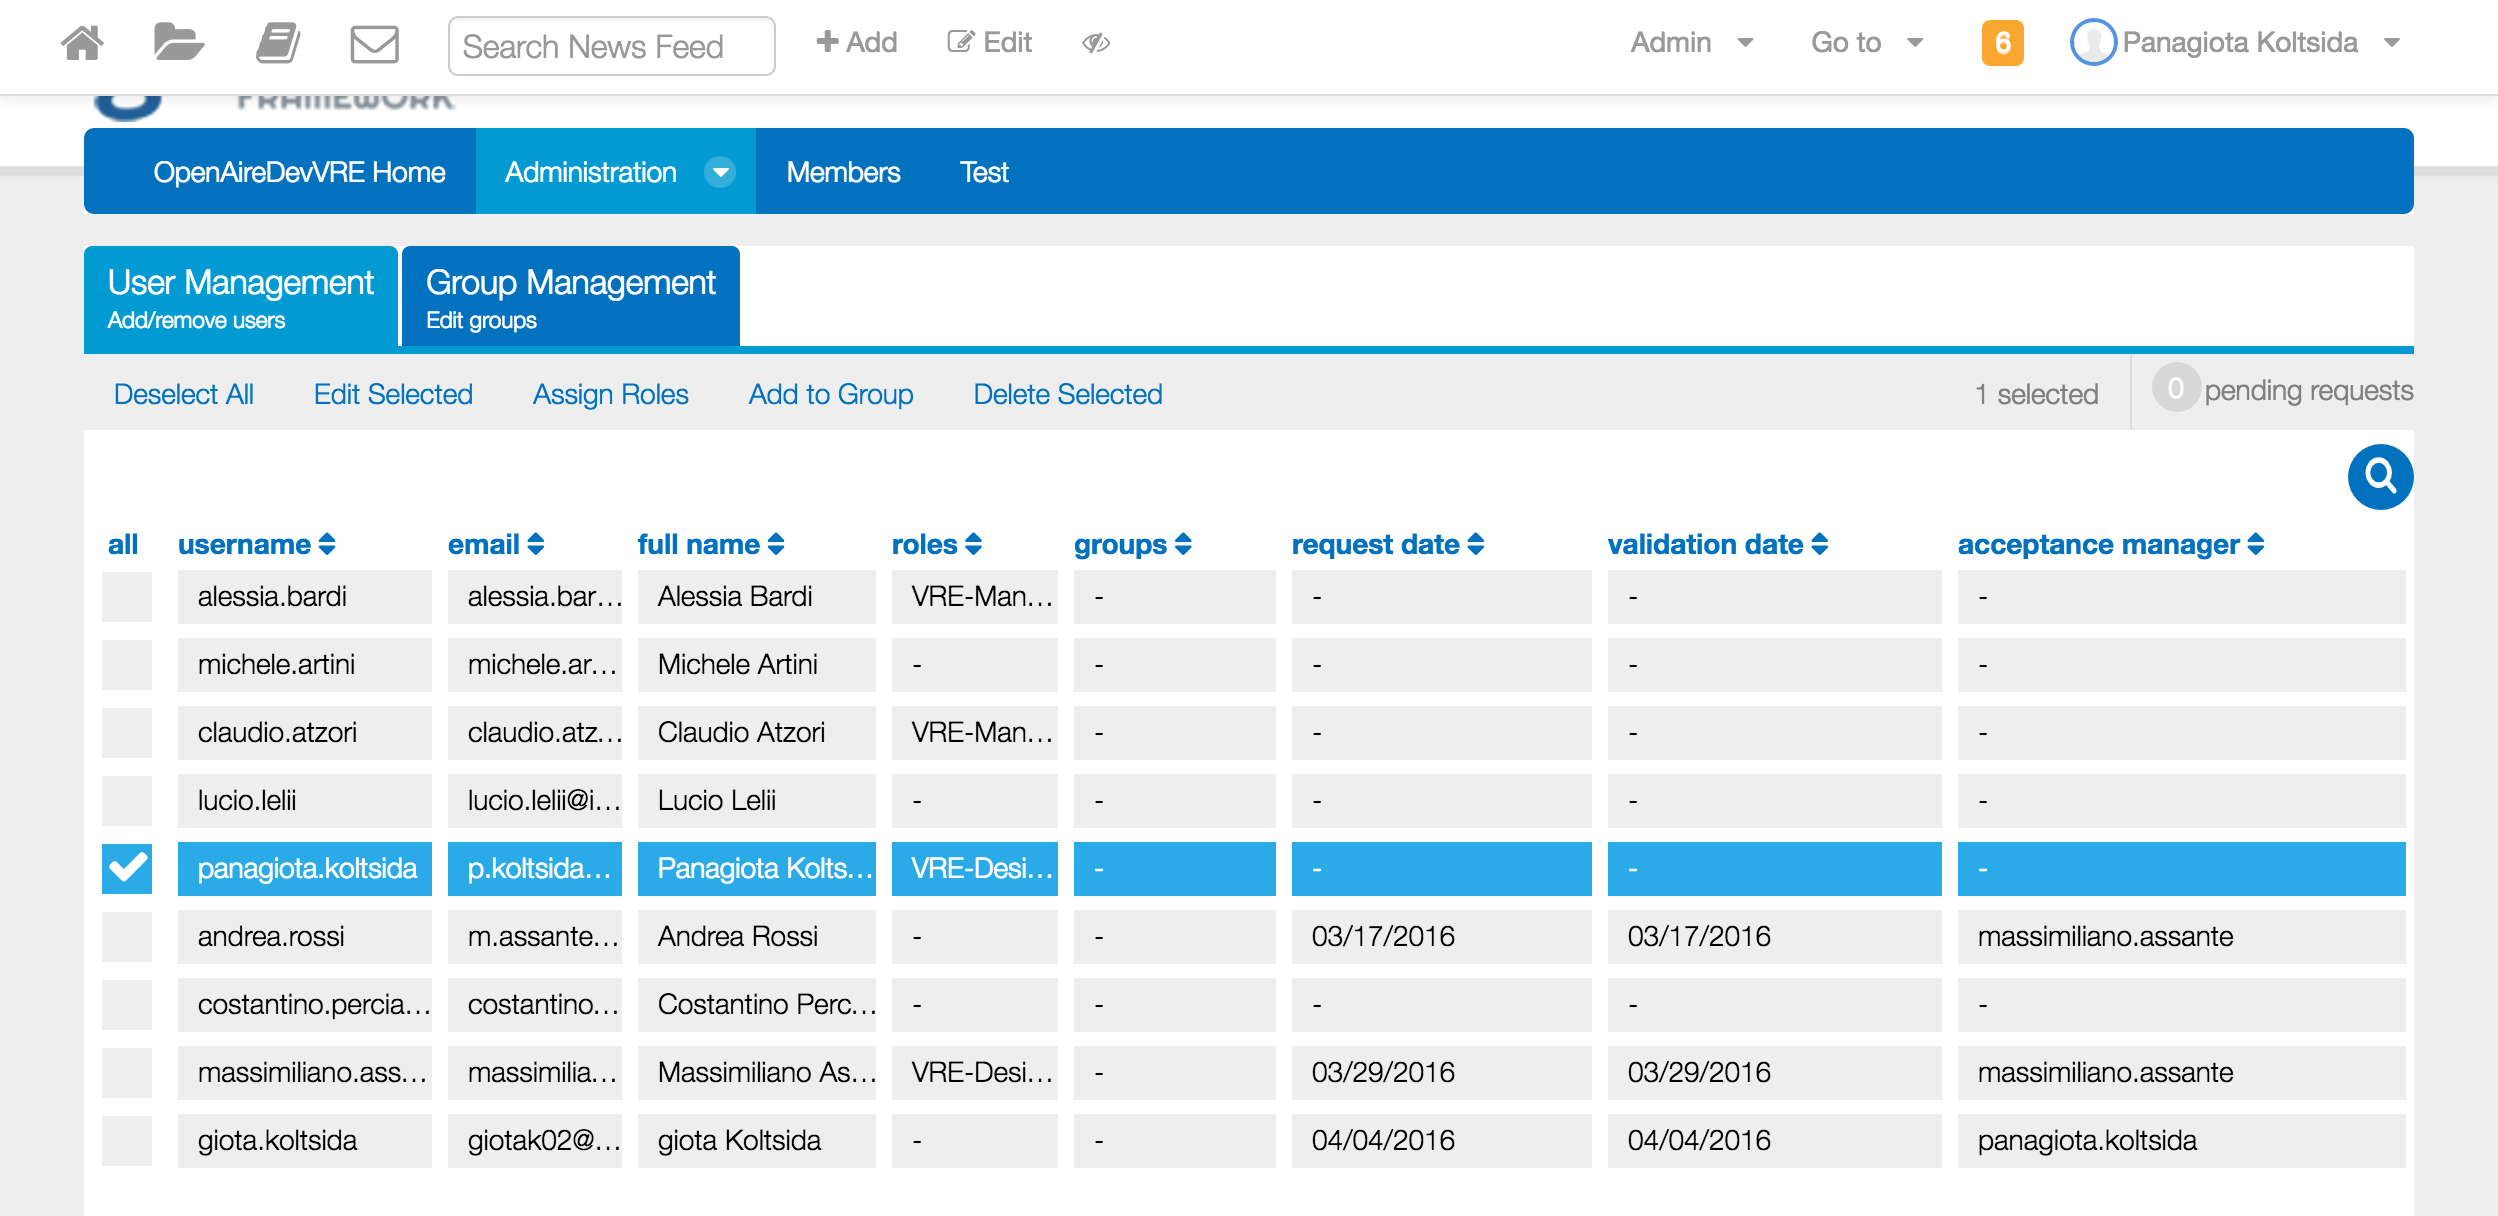
When you select one or more rows the following options are activated:
- Deselect All: unselects the selected rows
- Edit Selected: Edit the selected users' roles and groups. You have the option to remove the pre-existing roles and groups before adding the new ones
- Assign Roles: Assign roles to the selected users
- Add to Group: Add the selected users to any of the available groups
- Delete Selected: Remove the selected users from the VO/VRE
These options are displayed on the top of the table as you can see below:
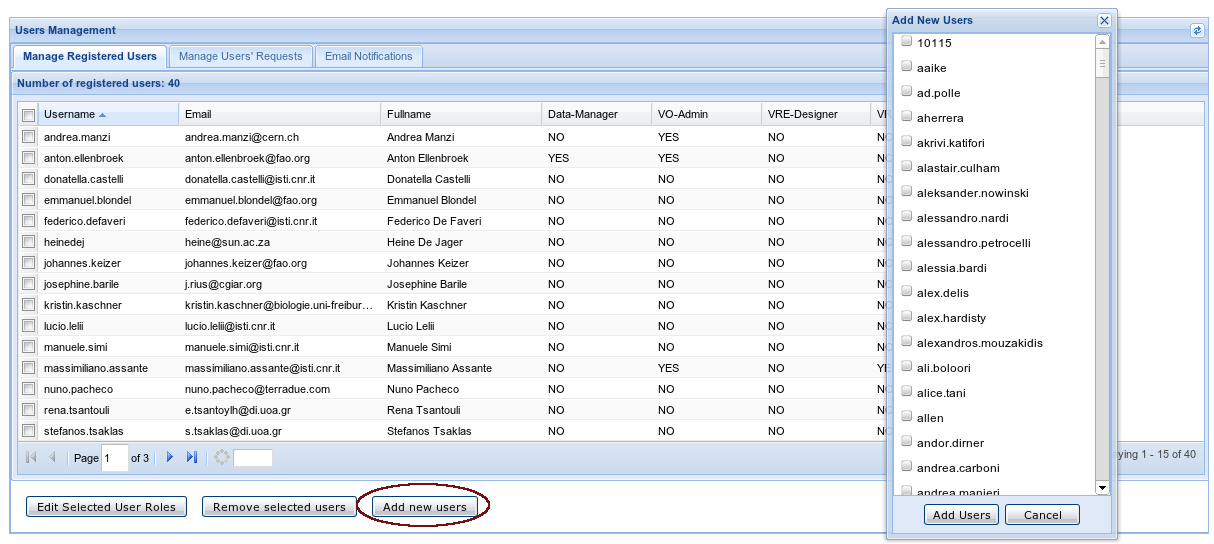
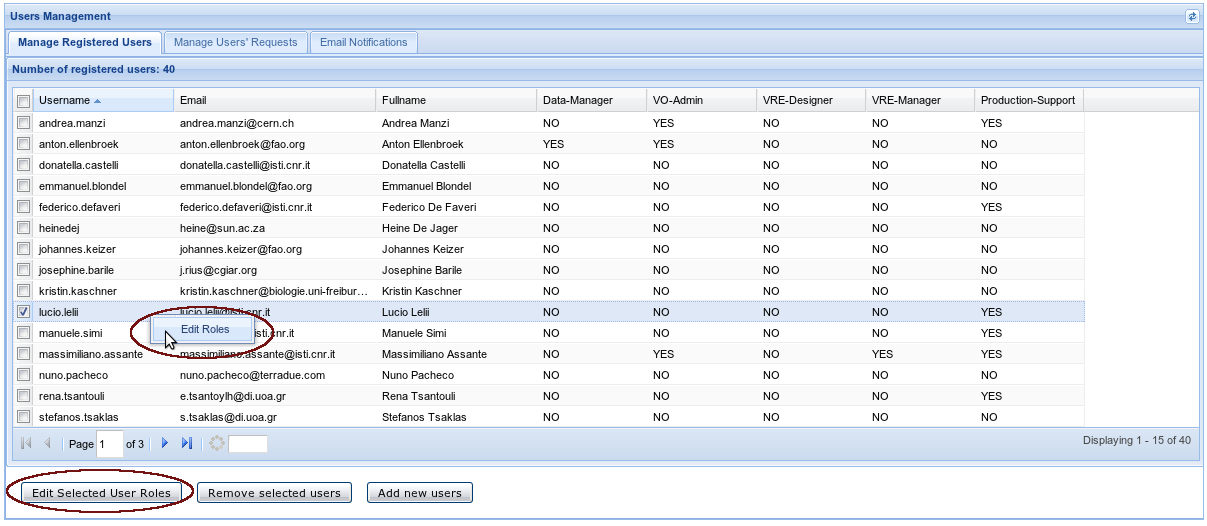
- The first tab - Manage Registered Users - is for the management of the existing users and their roles. The users that are currently registered to the VO/VRE and their roles are displayed.
- You are able to change any user's roles. This can be done either by right clicking on the user you would like to edit and then click the edit roles option, or by checking the user you would like to edit and click on the Edit Selected User Roles button. Notice here that this button is functional only when only one user is selected.
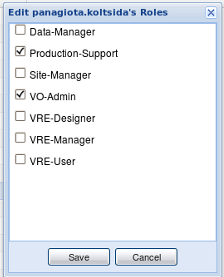
A pop-up window appears listing all the available roles with prechecked the user's current assigned roles.
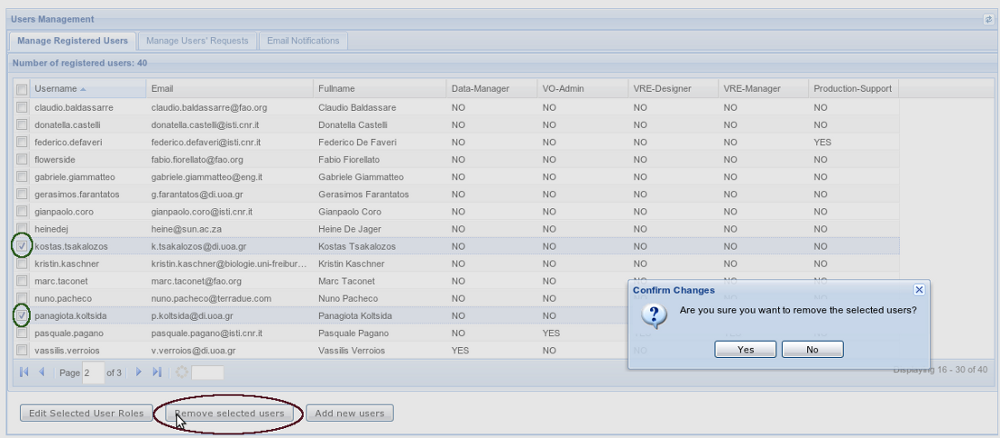
- You can remove any user from the current VO/VRE. Select the users you would like to remove and click on the Remove Selected Users button. Confirm the deletion action or click "No" in order no to apply the changes.
- You can add new users to the current VO/VRE. Click on theAdd new Users button. A pop-up window appears where you can select which users will be added.
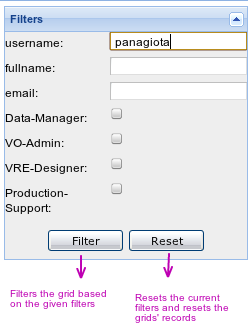
- Using the filter panel you can filter the list with the available users by providing at least one criterion. If you provide more than one criteria then the list is filtered by matching all the given criteria.
- You are able to change any user's roles. This can be done either by right clicking on the user you would like to edit and then click the edit roles option, or by checking the user you would like to edit and click on the Edit Selected User Roles button. Notice here that this button is functional only when only one user is selected.
In order to filter the grid you have to click on the Filter button. If you want to reset the filters and list again all the available users click on the Reset button.
- The second tab - Manage Users' Requests - is for the management of the users' requests for registration. If a user that does not belong to this VO/VRE has requested to be registered to it, his/her name appears at this list and the manager can decide if this user will be added to this VO/VRE or if his/her request will be rejected.
- Users can ask for registration using the login portlet. Then an email is sent to the managers who can approve this request.
- In order to approve some requests you have to select the users you would like to approve and then click on the Authorize selected users button.
- After this step you should go to the first tab in order to assign roles to the new users. A message informs the manager about the next required step.
- In order to reject requests you have to select the users you would like to reject and then click on the Remove selected users button.

- If there are no requests for registration a information message appears. You can click on the Refresh button in order to check for new requests.

- The third tab - Email Notifications - is for sending either automated emails by loading any of the available templates or not automated by writing your subject and body message to all registered users of the current VO/VRE.
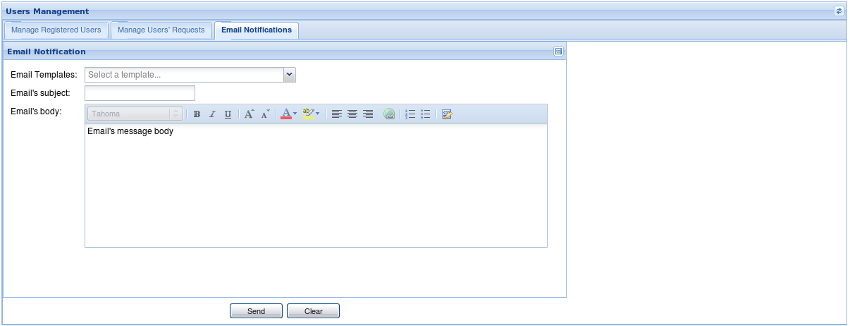
- You can load any of the available templates, make some changes if needed, and send the email by clicking on the Send button.
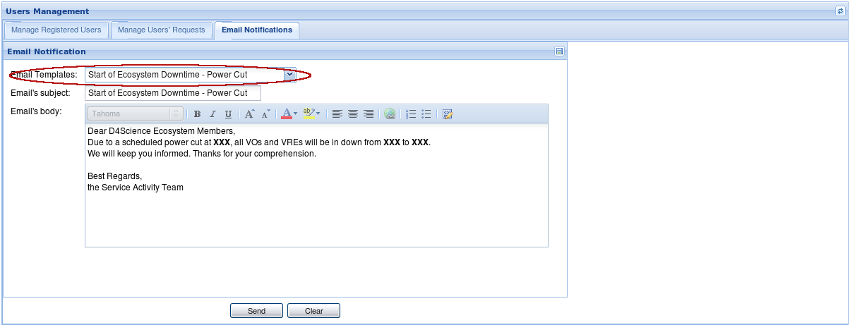
- You can write an email in HTML format by using the rich editor that is provided
- You can save the resistered users' names and their emails to an external file at your desktop by clicking on the icon placed at the upright corner of the panel. This is shown at the image below.
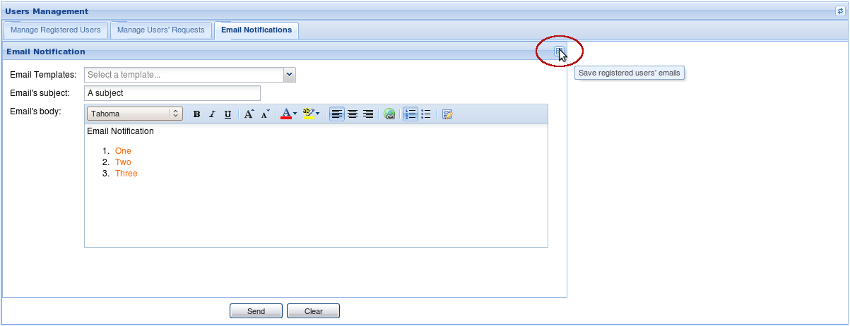
- You can load any of the available templates, make some changes if needed, and send the email by clicking on the Send button.
Deployment Guide
When deploying this portlet a configuration file named: umPortlet-email.config should be created and placed under: "$CATALINA_HOME/shared/d4s" directory.
The content of this file should be: email.to=EMAIL_ADDRESS, where EMAIL_ADDRESS is the email that will be used in the TO field from the portlet's email system.
- NOTE: This file is not mandatory. If it is not available, then the sender's email address will be used in the TO field.
