Difference between revisions of "Time Series"
(→Time Series Import) |
(→Time Series Manipulation) |
||
| Line 153: | Line 153: | ||
* '''Aggregation''': values aggregation by column selection. | * '''Aggregation''': values aggregation by column selection. | ||
| − | + | When one or more operations are applied is possible to save the modified TS. | |
| + | In any moment is possible to discard the last applied operation or all operations. | ||
| − | + | The status bar indicates which operations are applied. | |
| − | [[Image:ts_operation.png|frame|none|Time Series applied | + | [[Image:ts_operation.png|frame|none|Time Series applied operations]] |
| + | |||
| + | ==Time Series History== | ||
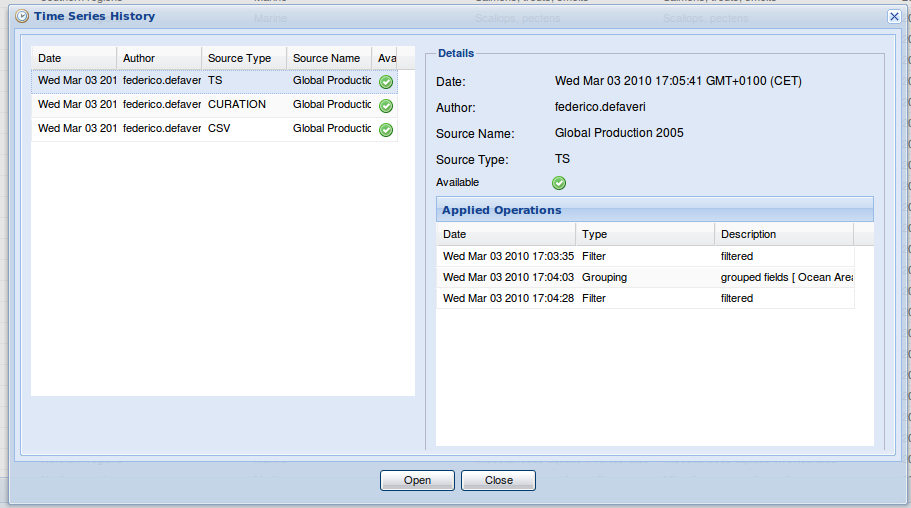
| + | The Time Series system register the history of all main operations applied between the different TS versions. | ||
| + | |||
| + | To show the history click on history button. | ||
| + | [[Image:ts_history.png|frame|none|Time Series history]] | ||
| + | |||
| + | For each TS version a list of all applied operations is showed. An availability status indicates if the version is currently openable. | ||
== Filtering == | == Filtering == | ||
Revision as of 17:02, 3 March 2010
Contents
Time Series elaboration cycle
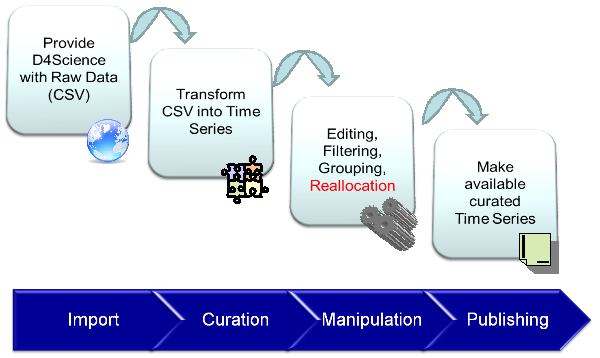
Time Series elaboration cycle is made up of four phases:
- Time Series Import: a TS is imported through in the system though a CSV file.
- Time Series Curation: TS is corrected and cleaned.
- Time Series Manipulation: TS is elaborated depending on user need.
- Time Series Publication: TS come available for the community.
Time Series Import
Through a wizard interface a Time Series, represented as a csv file(RFC 4180) is imported through in the system.
CSV file can either be imported by uploading the file from the user file system or from the user workspace.
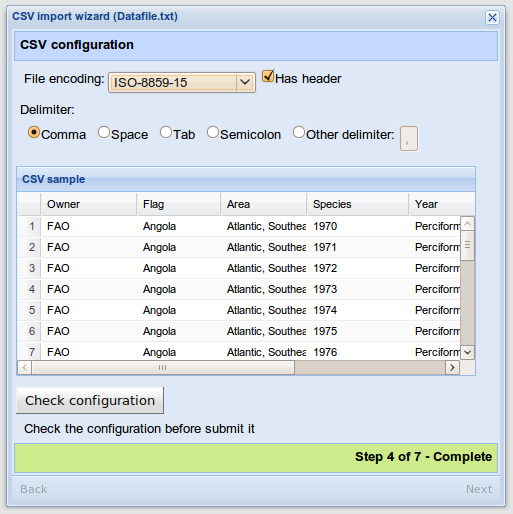
Once a CSV file has been loaded it is possible to select some parameters relative to the uploaded file:
- Character Encoding
- the file header flag
- field separator
- columns to import/exclude
The configuration shows a CSV sample based on the selected parameters. This sample is limited to the first 50 rows.
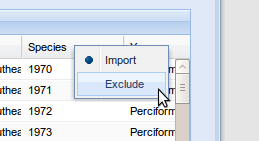
Through the sample grid, it is possible to select which columns a user wants to exclude from the importing.
In order to made the system accept the current configuration it is necessary to verify the whole file by clicking on the “Check configuration” button. The system will check then the entire CVS for RFC 4180 compliance.
If there is any error it will be possible to see which rows are wrong and, in case, to decide to skip them in the importing phase.
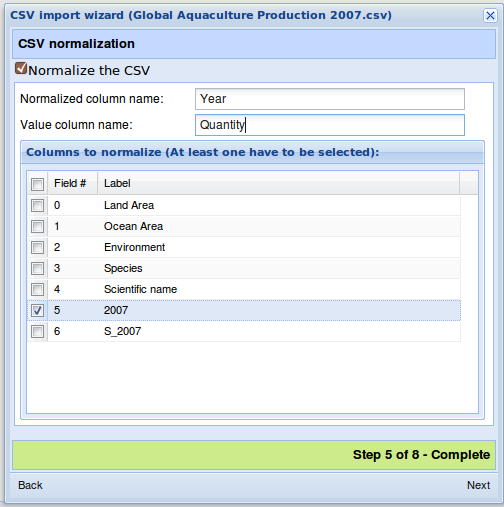
The CSV can be normalized during the import phase. The normalization operation require the following parameters:
- the normalized column name
- the value column name
- which columns normalize
For example, the following CSV:
| Country | 1998 | 1999 | 2000 |
|---|---|---|---|
| Italy | 123 | 456 | 160 |
| France | 742 | 788 | 122 |
when normalized setting as normalized column name 'Year', as value column name 'Quantity' and with columns to normalize '1998', '1999' and '2000' is transformed in:
| Country | Year | Quantity |
|---|---|---|
| Italy | 1998 | 123 |
| Italy | 1999 | 456 |
| Italy | 2000 | 160 |
| France | 1998 | 742 |
| France | 1999 | 788 |
| France | 2000 | 122 |
Once the configuration phase is completed it will be possible to define metadata for the current imported CSV.
The last step consists of a CSV creation into the system. During the creation a loading bar will indicate the overall progress of the operation.
CSV Data Handling
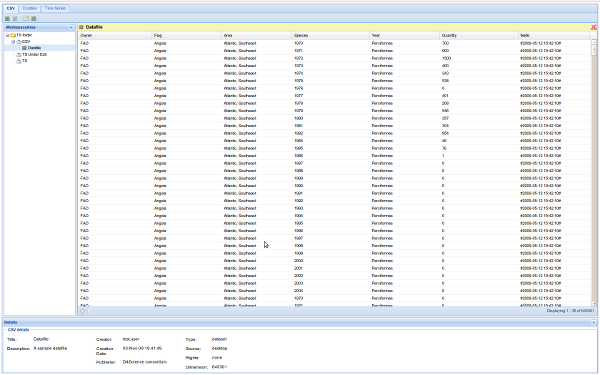
Once the CSV has been created it will be possible to open it for examining its content. (note that the content can be ordered at this time)
A CSV can be exported directly into the Workspace, see TS CSV export section.
In order to start the curation phase it is necessary to transform the imported CSV into a TS by clicking on the button “Create Time Series”.
Time Series Curation
The Curation phase allows to curate a TS by linking it to the reference data and consequently correcting eventual errors.
Each TS column can belong to the following types:
- Dimension: an attribute of the observation whose values come from a controlled vocabulary, key family or reference data;
- Attribute: an attribute of the observation whose values are freely defined;
- Value: the observation (quantitative value) captured by the time series;
In order to define a curated TS it is necessary to cure all the columns. The yet cured columns are shown by using a green filled circle in the column header. The not yet cured columns are shown by using a red filled circle in the column header.
Column Curation
In order to start curating a column, user should right click on the column header and select the item “Edit properties”. A new panel will appear for the column property editing.
This panel allows to rename a column by editing its label.
By using the radio selection buttons it is possible to select the column type.
For the attribute types and values it is possible to select the data type: Text, Integer, Float, Date, Time, Boolean, Timestamp.
For the type Column it is possible to edit the family key and key value to associate. By using the check errors button it is possible to know how many rows contain errors associated to that dimension. By using the sample button it will be show a sample of the values with the reference data referred.
For each column it is possible to exploit the GUESS tool, which will try to guess which reference data has to be associated to the column by using the reference date present into the system. For each proposed dimension the errors number will be automatically calculated.
Once the configuration is done, it is either possible to save or discard the changes.
If the column has been associated to a dimension and, there are some rows which contain errors, the system enters in a mode called error editing.
Error editing
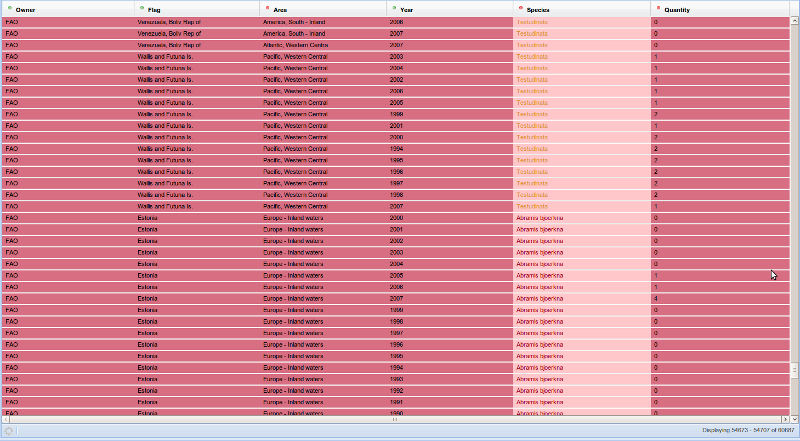
In this modality only the containing error rows are shown.
The row error can be due to the following reasons:
- the value cannot find its equivalent among reference data values
- the value finds more than a correspondence among reference data values
These two types of errors will be shown by using different colors, red for the first one, yellow for the second one.
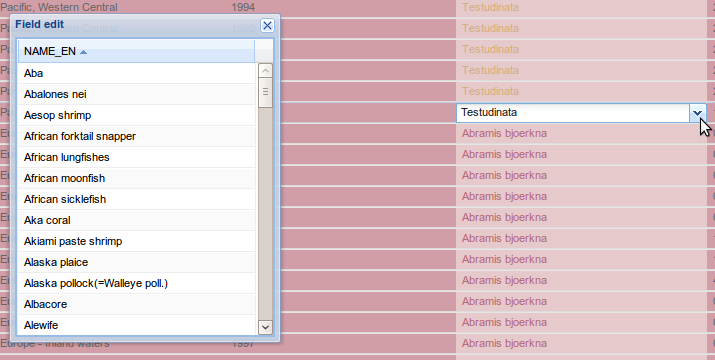
System allow to edit the values for each single column. If the cell belong to type dimension, a popup will appear with the list of possible values to associate to it.
It is possible to discard all the changes going back to the previous column configuration any time.
Once all the rows are corrected the system will ask to the user to save the changes applied so far.
Note: It won't be possible to discard the changed made in editing mode.
Editing and Column removal
It is possible to edit single column values at any time. In order to remove a whole column from the TS, right click on the column header you want to remove and select “Remove column”.
Curation Closing
Once all column have been curated it will be possible to close the Curation publishing the TS in the Curated TS list.
Time Series Manipulation
A Time Series can be manipulate through the following operations:
- Filtering: filter the TS by Column or Values criteria.
- Union:Union of two Time Series.
- Denormalization: Denormalization of TS Values.
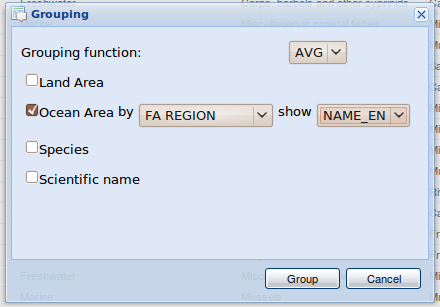
- Grouping: grouping of values by column selection.
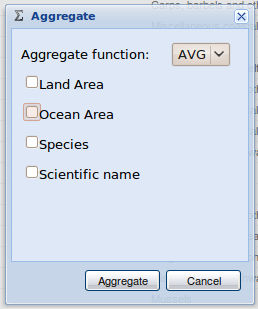
- Aggregation: values aggregation by column selection.
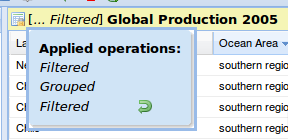
When one or more operations are applied is possible to save the modified TS. In any moment is possible to discard the last applied operation or all operations.
The status bar indicates which operations are applied.
Time Series History
The Time Series system register the history of all main operations applied between the different TS versions.
To show the history click on history button.
For each TS version a list of all applied operations is showed. An availability status indicates if the version is currently openable.
Filtering
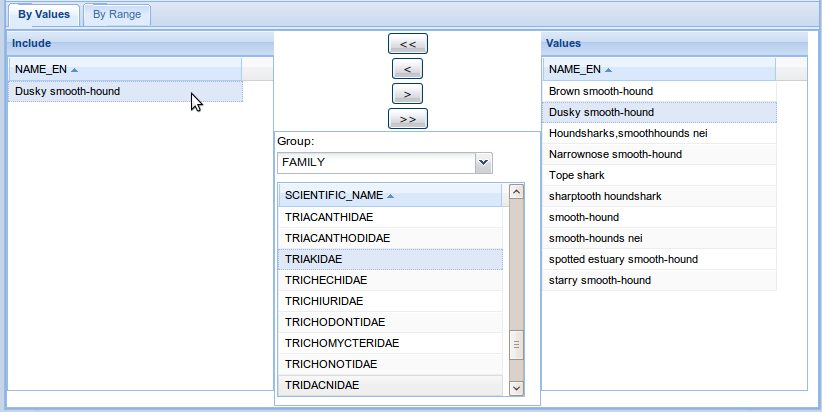
It is possible to filter the TS by selecting the filtering conditions to apply to the TS Column Values.
Clearly condition types vary depending on the column type:
- for each column type is possible to apply conditions based on compound expressions: filtering by range;
- for each column of type dimension is possible to define a set of acceptable values: filtering by value.
Union
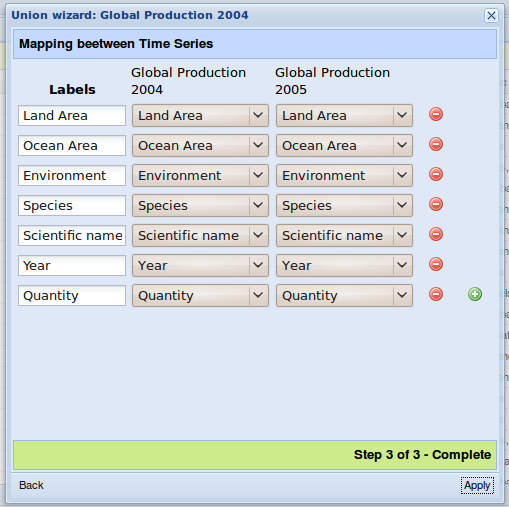
The Union operation merges two TS in one single TS.
The full operation is executed by using a Wizard interface.
First step consist of selecting the TS to merge with the one currently open. Once step first is done, system checks for compatibility.
In the current union operation we define two ts compatibles if they have the same number of columns and these columns match for type and order.
Denormalization
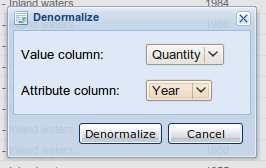
The facility to display multiple and related observations on the same row. Denormalization is performed by selecting the attribute and the value of interest. The result is that all the observations sharing common values on the rest of columns are merged into a single row containing as column name the attribute value and as value the relative value.
For example, the following time series:
| Country | Year | Quantity |
|---|---|---|
| Italy | 1998 | 123 |
| Italy | 1999 | 456 |
| France | 1998 | 742 |
| France | 1999 | 788 |
when denormalized by the attribute 'Year' and the value 'Quantity' is transformed in:
| Country | 1998 | 1999 |
|---|---|---|
| Italy | 123 | 456 |
| France | 742 | 788 |
Grouping
Grouping is the facility for combining multiple observations. It is performed by relying on the Dimension columns of the time series. Besides selecting the Dimension of interest, the user is requested to specify which is the quantity of the observation to be aggregated and which is the aggregation function, e.g. sum, average.
For instance, a time series having observation on a country-level granularity can be grouped into a time series having observation on a continent-based granularity by summing the national observations.
For example, the following time series:
| Country | Year | Quantity |
|---|---|---|
| Italy | 1998 | 123 |
| Italy | 1999 | 456 |
| France | 1998 | 742 |
| France | 1999 | 788 |
when grouped by the dimension 'Country' as 'Continent' with the value 'Quantity' and by using the 'sum' function is transformed in:
| Country | Year | Quantity |
|---|---|---|
| Europe | 1998 | 865 |
| Europe | 1999 | 1244 |
Aggregation
Aggregation is the facility for combining multiple observations. Similarly to the Grouping it is performed on the Dimension columns, the semantic is to not consider the different values of the selected Dimension. Besides selecting the Dimension of interest, the user is requested to specify which is the quantity of the observation to be aggregated and which is the aggregation function, e.g. sum, average.
For instance, a time series having observation on a country-level granularity can be grouped into a time series having no country-related information by summing the per country observations.
For example, the following time series:
| Country | Year | Quantity |
|---|---|---|
| Italy | 1998 | 123 |
| Italy | 1999 | 456 |
| Tunisia | 1998 | 742 |
| Tunisia | 1999 | 788 |
when aggregated by the dimension 'Country' with the value 'Quantity' by using the 'sum' function is transformed in:
| Country | Year | Quantity |
|---|---|---|
| All | 1998 | 865 |
| All | 1999 | 1244 |
Time Series publishing
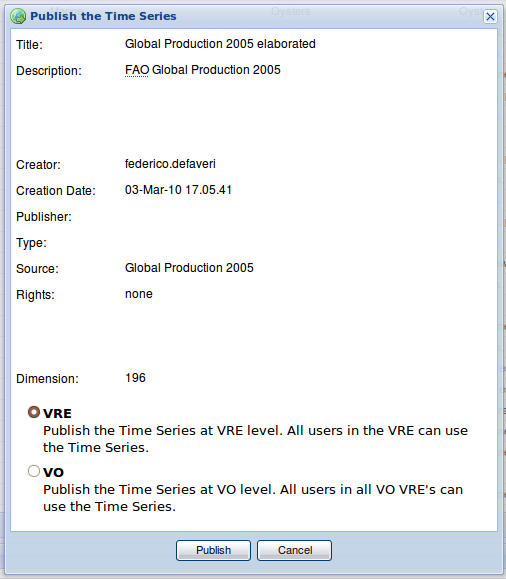
A TS can be published either at VO or VRE level at anytime.
Time Series Export as CSV
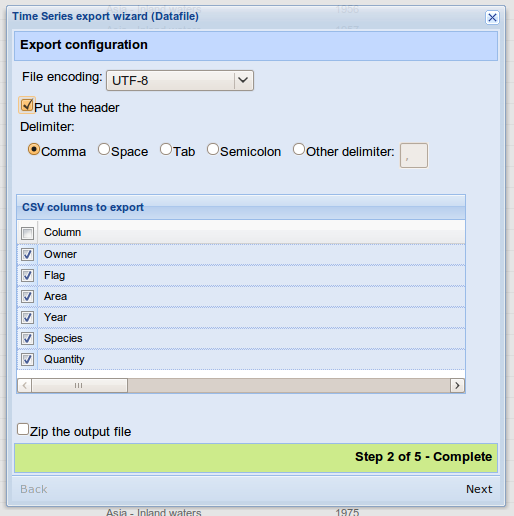
A TS can be exported in the user workspace using CSV format.
First step consists of the configuration of the csv to create: char-set selection, field separator, column selection and so on.
Second step asks for the basket in which save the CSV file.
Workspace integration
TS can be saved as items in the user Workspace
In order to open a previously workspace saved TS, or from another user, click on the “Load from workspace” button.
